Release Notes / 2025.12.29

About two weeks since the Uncoiling EP as released and it has been good. Plenty more to do but given the general small scale of the approach and release, I am happy with how things are going. A few reviews, some plans laid out, and a first gig as Nílim to break the back on the effort. More to follow but a couple of notes here on it while I am sitting at the laptop, about any and all elements of it as I think of them:

The shirts came out lovely thanks to Merch Limbo, they did a great job on them. They even flagged a dithering-related issue during the process and I was able to resubmit a corrected version of the art for them to work with for best results, delighted they did this. Could only ever recommend them.

The end result on the prints went well but shipping them is a little awkward for the thing they are alone, so I coupled them as a shirt/print set and that is how they were sold both online and at the gig. Being able to couple versions of the digital art and bring it further physically on both the shirts and prints is important to me. Beyond just the music, there is a focus on the art, physicality, and presentation of the project, this site included, this post included. I will dig more into this concept again in the future when there's more to the music and art up online so it makes more sense (or maybe I'll be able to explain it better then).

I am happy to see people enjoying the release and beyond talking to people directly about it, there have been a few reviews and posts about it online. I am attempting to keep track of them here and link back to the sites that have anything up as some way of thanking people for investing any time in this.

Opening a Bad Reputation gig for God Alone and Emily Panter in Dolan's was lovely and it felt good to get the material out live. Both other bands are great and I recommend checking them out if you don't know them. It is great to play a familiar stage to familiar people to air new music live and iron out some setup kinks, and it has me excited to look for more now I know it works live. Photo from the gig of some of my own gear and the other bands' stuff, while it was set up on stage.

More notes down the line on art, music, releases, gear, setups, gigs as they happen rather than this style of thing but I wanted to put some note on the release of the EP all the same.

Pedalboard I / 2025.12.20

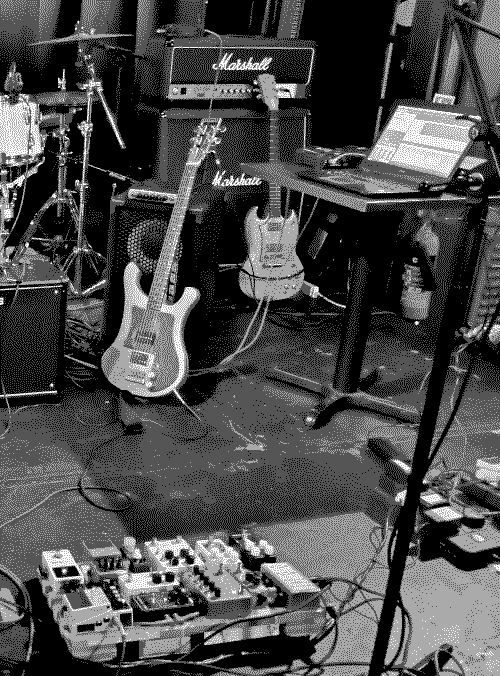
It has been a week-ish since the EP was released and I have a few notes to post in here about the process around that too, as well as finishing the art, but I am half cut so I will attempt to cover something I can talk about without thinking instead: A PEDALBOARD.

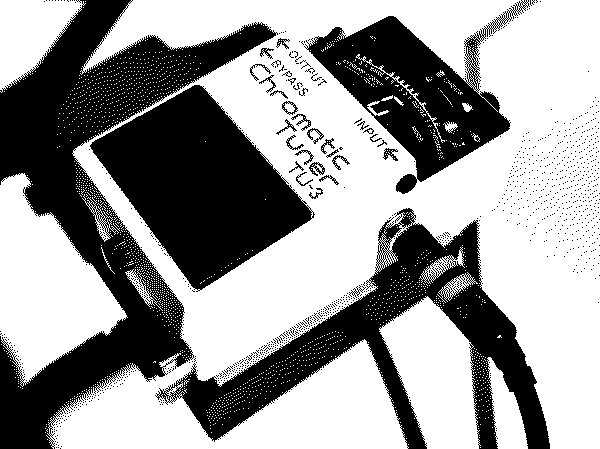
I have been using the same general board for some time. I have went through several iterations of this in Third Island, generally using the same pedals and approach outside of the distortions. Always have a reverb, delay, low octave, and tuner. To be fair, in most setups you should be able to get away with this for a minimum if you've access to a good amp at a gig, and could lose either the delay or reverb (to taste) but given the style of music and approach for myself it was always going to be expanded on.

I love Moose Electronics' Battlehammer and Sundrive, and for years I used these in parallel, using a Boss LS2 as a mixer, for my guitar tone. I would run the BH dark and the SD bright, tweaked to taste, and found I could get a good heavy crush out of my low end but retain some clarity in the highs without the sound actually appearing separate at the output. I would always recommend experimenting with parallel blending if you are struggling with your tone, at the very least it will help you understand what you are looking for in a distortion.

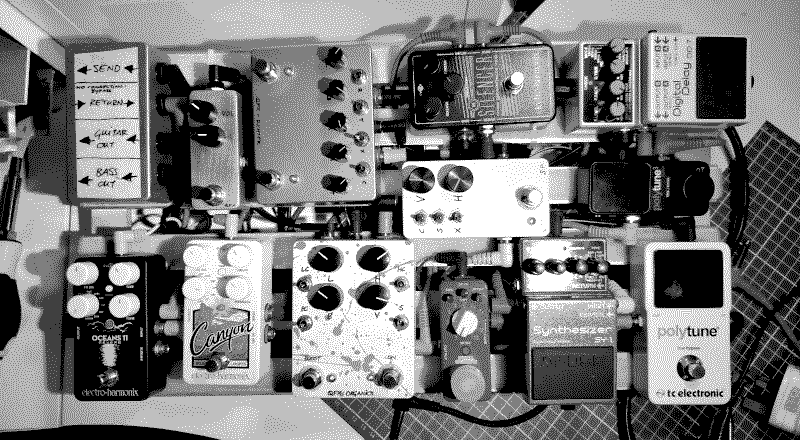
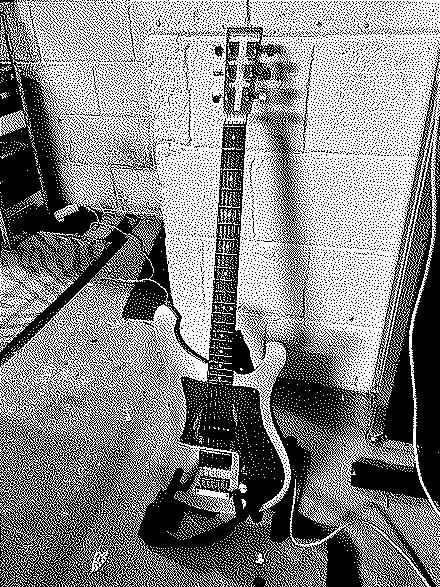
On and off I would use other fuzzes and dirts, as replacements and accents, but I eventually replaced the whole dirt setup with two of my own builds, the Sardonic Perpetrator and the Organics. The SP is a Harmonic Percolator clone with clipping and high pass options, that I use as an always-on early dirty boost on my rig. The Organics is a parallel Low & High passed overdrive that lets you control & colour each band to taste. The shift worked well with moving to the Tides aluminium baritone as my main guitar, and proved even better when I realised how good the P90 in it was. Clarity, Violence, and Heft - what I always wanted!

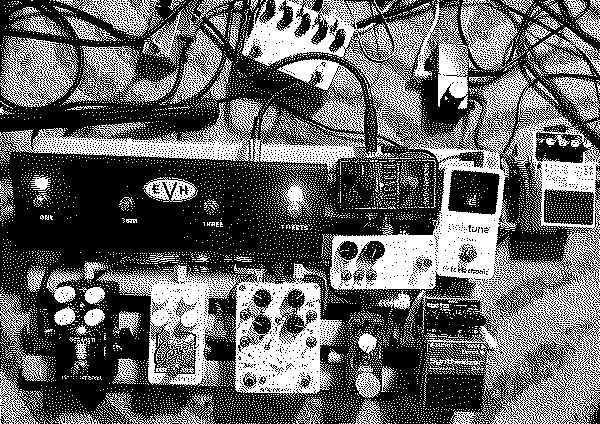
Mentioned below, For Nílim I rethought the parallel approach to allow another line for bass. Once this was settled on, I had to make room on my board to make it gig-friendly and simplify things a bit. Approach it functionally - you only want what you use at your feet, and always-on or routed gear goes to the back of the board. No "just in case" gear, you use it or you don't. Be strict to purpose and in line with function. Boards are malleable when you are writing, jamming, but make it purposeful for gigging.

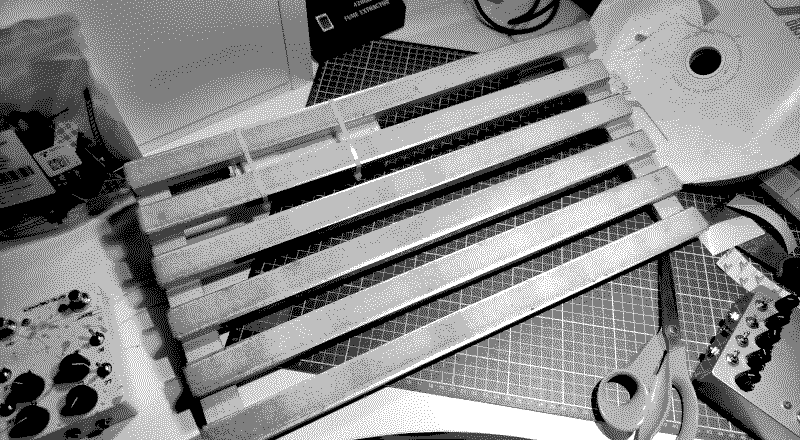
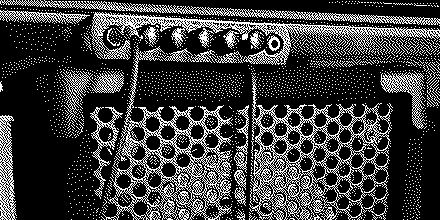
A brief aside on the actual board here. In a previous job I salvaged some mixed material crates, and built it from those. It is aluminium rungs with wooden supports. Some rubber chair risers are on the front with wooden off-cuts to give decent height. The entire thing was assembled to fit a shoulder carry soft case I already had. I recommend you do something similar. Pedalboards are made from anything at all, but make sure you can carry it comfortably and you have a means to do so. You can absoluteley cobble the board together from anything.

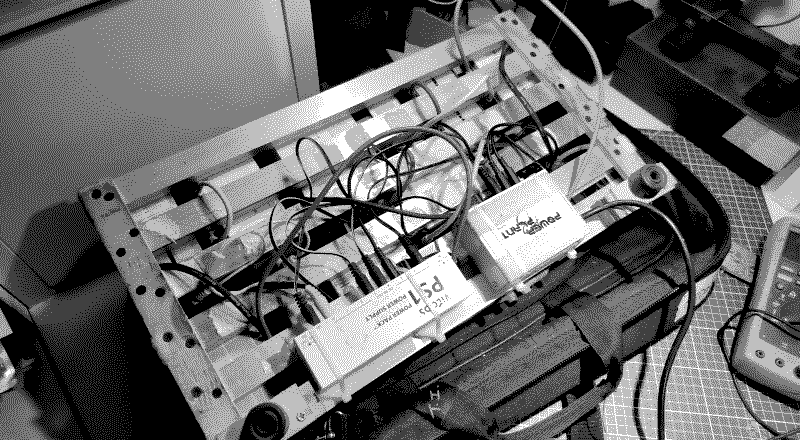
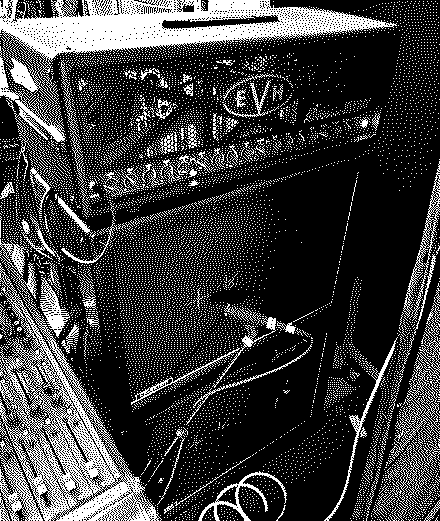
I won't reiterate on the signal chain itself (see post on 2025.10.13). The new layout put everything that didn't need switching to the back of the board - including the full "bass" line chain - and I tidied up the cabling. I ran my Organics at 12V for a little more headroom, which works nicely with my current tube amp. Without going too technical, I've no clipping options on and the Op Amps in the pedal work up to/over +-18V so you won't get rail breakup at higher gain values, allowing you to cleanly push an amp harder with the output. This is a per-rig setup and may not work depending on your own amp or preferred type of pedal/amp distortion but it works here, pushing the clean channel of a 5150 basically.

Obviously building and maintaining your own patch cables is ideal but even as someone who can do that, let's be realistic here - use some that suffer decent online reviews and have a relatively low profile. Thomann's half-profile jacks are decent to dig you out of an awkardly tight layout. Most importantly pay attention to foot spacing on the front row and don't needlessly optimise. If you plan on changes, plan it again when you change it again. I used whatever I had, some bought and some pre-made from older builds. I stripped all the old cable anchors off to redo my underside runs.

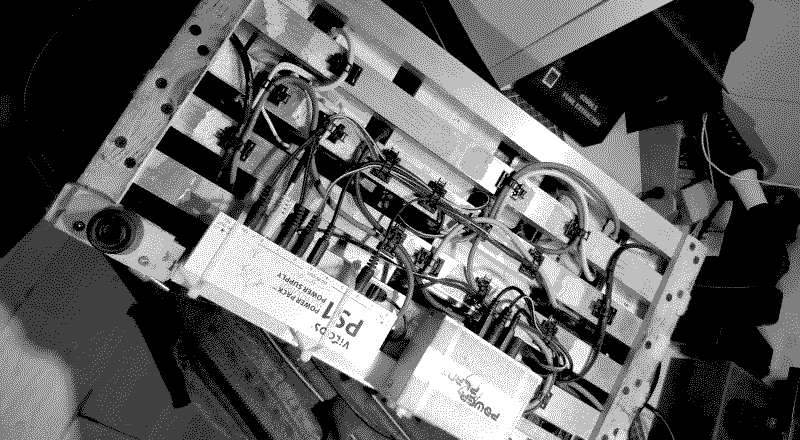
Nobody wil see underneath but it will help you troubleshoot to tidy it right. Use cable anchors, ties, velcro, whatever you have. If you want easy access, use velcro loops. Cable anchors are absolutely the best but make sure you have a means of ripping them apart short notice if anything fails. Your housekey is sharp enough to pop a cable tie if you hook it angled against the base/tooth and use it's own pressure against itself.

I am running a 4-cable method as well as a separate bass line so I needed a patch bay to at least simplify the outputs and returns on the board. I had plenty of jacks here and a 125B enclosure, so I could drilled out four on each side and made up my wiring internally as needed. I made a send/return loop using switched jacks so if nothing is plugged into them, it defaults to pass through. A useful exlusion to allow you to adapt to other people's gear. I also wired up the main guitar line on both audio and power (using two separate supplies) so you can plug directly into the guitar line only via the first tuner if needed. I even left some slack on the anchored cables to let this swap work without issue or removing pedals.

Artwork II / 2025.12.07

The actual album art comes from a photo of some odd shelf mushrooms growing in a circle out of a decaying tree stump in Curraghchase. I liked the look of the fresh webs covered in dew hanging from them. There were multiple working album art images, but this one I kept coming back to and tweaking. Because of the work done and loose notes, the process itself is lost and chaotic, helped by absolulety no back ups and destructive edits. I couldn't replicate it exactly if I tried. The loss of process is both important and frustrating to creative acts.

I love the dithered effect on images but spent particular time on iterations of this to balance the clarity with disintegration, to make it discernable and album-art quality and still remain vague. Other art candidate images were generally further dithered or finished off and uploaded to the main page as they happened. One that ultimately never went anywhere but was intended to be the original art is to the left.

Beyond the actual album art, I am working on a series of DIY prints for inclusion in another merch bundle due up in/around release date. I'll post versions of these on the main page this week for posterity (like this one) but they are not entirely the finished article. A series of six images was created in a similar pattern and approach, using basic edits in GIMP from photos I have taken myself with cameraphones over the past few years. These are going to be finished by hand.

A Frame was made by selecting an A4 landscape area in decent resolution to work in (300dpi is fine). A white background was filled and duplicated as a new layer, then guides set about 40mm in on all sides and the center removed from the top layer. This let me sandwich a photo between the FRAME and WHITE BG (see picture) to give a defined space for working in and allow run over on hand drawn elements later. Photos are dragged in in full colour/resolution, and edited within the frame without impacting on it.

Generally straightforward tools are used from here. Cropping and scaling to find and fit the exact section of each photo I want. Desaturation (very simply) to get it black and white. From here I used small changes to exposure and contrast to try "separate" the layers of grey, trying to add vibrance without colour for better effect with the next edits. When I got it to mostly were I liked, I would fine edit small sections with the eraser and simple paint tools, to take out any awkward sections that jarred the end result. I dithered the image using RGB and Alpha values as low as possible. This gets the image down to just black and white elements. To confirm this, I then posterized it to two colours and changed white to alpha, comparing against the black and white BG layers to ensure consistency.

The print-ready files were bounced to a new layer to flatten them without impacting the working frame, and this one layer then saved to .pdf for printing. I'll find out tomorrow how that goes, and will post some working shots of the hand edits when it is all done. The versions posted here are further dithered and reduced in scale.

UPDATE: The work printer takes 220gsm card but toner is dogshit and smeared the prints. DIY Photocopy Aesthetic takes a knock here and I will revert to the Pixma instead for a little upgrade once the ink arrives in the post.

Artwork I / 2025.11.26

In absolutely typical form, I have no art prepped for the first post about art. At least there's good reason. I'll have EP release info up soon and the album art will be posted along with it, with some more merch art and a couple of .gifs while I'm at it.

Love making artwork and even though it is all digital, I usually do some by hand, but this time everything was done on a computer. Well, a phone or a computer. So far at least - I have one or two things to do that I'll runover in another post that will be a bit more handmade.

Aside from a phone camera, pretty much everything is done in GIMP. For some edits and ideas on the go, I'll use Pixlr on my phone, but I hate it deeply since it became rattled with AI and ads and do not recommend it at all. It's useful for quick exposure and desaturation edits but I try to do the work in GIMP instead, and will always finish an image in there. For some dithering and elements for larger images on here I've used Dither Me This, which is top class, but if you're looking at it on this site then there's a 99% chance it was made in GIMP.

More to follow when I have the remainder of the art uploaded...

Vocals and Mixing / 2025.11.17

It is nearly a month since I updated anything here but I dove into the lyrics and vocals on the new music instead. It is not something I desparately enjoy doing but often like the result, so it often ends up being severely procrastinated. I forced myself to go in with lyrics half completed, but the simple theme in hand, to get things started but came away with everything written and only one song left to complete. This will be done this week.

There isn't as much to write on the method for this as diagrams are needless and again I have no photos. The setup is simple - a cheap mic on a stand, the same unknown model I use when I am jamming. A pair of headphones. No booth or pop shield or anything. The vocal style doesn't need much, it is simple again on purpose. Some delay and reverb in the VSTs in mixing, beyond general comp and EQ. Some of it is double tracked for emphasis but again it has to be performable live so it is straightforward.

The rest of the mixing is equally as blunt. Various compression, EQ, limiters and reverb across the different tracks but nothing outlandish and 99% of these are stock VSTs and JS effects that come with Reaper. Could it be better? Yes, but I won't punish myself for my level of skill here or get bogged down in fixing a mix that doesn't demand a lot of complexity. Should this project continue or shift in a different direction I might have to change the approach here, but as it stands I am satisfied with it.

I actually have art done but will do a post about that as the release comes together, likely will be ready to go early next month.

Notes from Recording Guitar / 2025.10.22

I hilariously have no photos from the actual recording session. So here's some rotting ivy vines from a few days some side of it.

My general mic setup for demoing in any of the bands is tame - an SM57 pointed to speaker cone centre at 45 degrees, about 6cm back on one cab, blended with a Superlux PRA628 hung directly cone centre on the opposite cone of a second cab, both 2x12"s with Celestions. The phase isn't perfect and the tones aren't spectacular on their own, but they play well with the rough room mix for demo'ing. This sits behind a little fabric and wood panel wall to isolate it a bit against drums. I blend as needed in Reaper.

This was the jumping point for tracking guitar again here, but I wanted to get a range of sounds off one take and try some different blends. I had three cabs: Top 2x12", Bottom 2x12", and Bass 2x10". What I ended up set up with was:

  • GUITAR CABS:
    • Top Left Cone:
      • Shure SM57 / centred / 45° speaker axis left
      • t.bone MB75 / centred / 45° speaker axis right
      • As if the two capsules were 90° to each other, focused on one point about 5cm back from cone dead centre.
    • Bottom Left Cone:
      • Shure PGA52 / centred / on axis / 6cm back
      • An absolute experiment but I'll come back to that...
    • Bottom Right Cone:
      • Superlux PRA628 / centred / on axis / 0cm - hanging in front.
  • BASS CAB:
    • Bottom Cone:
      • Superlux PRA628 / Right of centre / 0° / 0cm.
      • Literally strapped to the grille with cable ties.
    • DI:
      • Straight from the back of the Trace Elliot Elf.
      • End of chain DI, very useful later.

This appears to be a mess of combinations, and actually leaves out two later deleted mics - drum overheads I positioned in the room for "air" that sounded absolutely horrendous no matter what I did, straight into the bin with those - but I wanted some variety for mixing later. I tracked the guitars twice (identically for left and right sides) with the five mics and DIs each time, and the pedal chain split as below. It took about 2-3 takes per song per guitar side, with some takes completed in one run, after multiple attempts.

In the worst case, I would still end up with at least the SM57 tracked twice and a "bass" DI so I could work with those and nothing would be lost. As it turns out, bar the deleted mics mentioned, everything else works well in blend with each other. Mixing is ongoing and vocals are left to record.

Writing and Testing / 2025.10.13

This is late because I have already tracked the guitar now but it makes no odds what order this is written in.

Around a week ago I took the ideas written at home out into the louder environment for testing on the main rig. The guitar remained the same - the core instrument in this being a Tides Aluminium Baritone - but put through a run of pedals and a tube amp at an uncomfortable volume, for rework.

I didn't intend on splitting out a "bass" channel, as mentioned, but I couldn't get the idea out of my head so wanted to quickly demo this first. If it works, great, but if there is too much tweaking, or if moving forward gets lost to the idea of what it could be, then it gets shelved.

Not only did it work easily and quickly, but it fit perfectly in and has recorded a treat and is currently proving useful in the mix (I'll be back to that another time).

The main test here is playability. Mentioned below in another way but to reiterate the point of simplicity and the approach: the songs should be playable live and performed "live" for recording. Allowing the lack of perfection and blunt approach to guide the performance of the songs makes them a little looser and more straighforward, which is the aim of the project in general so it works here.

Each of the songs was played through enough times to see what effects should be used where, some tweaks made thanks to the bass split, and portions of riffs tweaked a little but in general they were good to go. More on the actual tracking later, but they felt good loud and worked well as just one guitar and drum machine.

Some fun stuff now: Signal Chain. I will actually map this and upload a drawing later in the week, including the mic layout used (if I can remember the distance and positoning of one of them...) but for now a brief outline of the main part of it.

GUITAR
Boss DD7 Delay
Used to split signal in two: Bass side 20-30ms behind Guitar
FX/BASS DRY/GUITAR
Tuner Tuner Send from EVH 5150:
Return to Silencer
QFX Richter
Bass Overdrive, used to EQ and push the low end of the tone
EHX Silencer / Noise Gate with send & return.
Send/Return loops contains dirt, octaves, and Amp pre.
Send:
Out:
QFX Gold Clone
An Acapulco Gold with a gain knob, with the gain set low, used as a preamp.
QFX Sardonic Perpetrator
Harmonic Percolator Clone, used for main guitar shaping, always on.
EHX Canyon
Good delay, on a low volume tape-style setting to air out some spacier parts.
Trace Elliot Elf
A pocket-sized but powerful bass amp
Boss SY1
Synth Pedal, used for a thick Organ-ish setting
EHX Oceans 11
Desperately underused reverb, shimmer setting again for some fake synth sounds trundling on underneath at times.
DI and Mic Mooer Pure Octave
Unusually decent octaver, blended on -1 to thicken up some guitar parts
To 5150 Return
QFX Organics
Bass Overdrive, used for main Guitar dirt, pushes Amp into horror
Out to two 2x12s
Harley Benton cabs loaded with V30s, cheap and unstoppable.
EVH 5150
100w Tube, clean channel, low gain, high volume.
4x Mics across speakers.Details on this later...
Send from 5150:
Return to Silencer.

Process / 2025.09.23

I never particularly know how to start nor do I intend on any updates here to be overly cohesive or coordinated, so I'll dive in sideways and fill in the gaps as it goes.

Part of the intention of the music in Nílim is simplicity. It has some various, simple, floating rules but primarily this simplicity is weighed in how performable it is with minimal equipment.

This has to lend itself to writing the music first and needs some restraint - which I barely have - so even as a method changes it still has to ultimately accomodate the planned result. The first two songs, the demo, were written very "live". It was loud and felt out, with the drum machine on a simple loop. After this, the MIDI was tweaked and the sounds tweaked and the guitar retracked in the jamspace at ridiculous volume, but it was kept in its main form.

Current new material was instead written at home, with the goal of rework in a loud environment rather than the initial writing. This, so far, has made the music slightly spacier and more varied, but was foricbly kept simple by input: Just a tuner and a DI. VSTs used were kept very bare, just stock settings on free Amp sims and one of the .js delays in Reaper. The big board and the big amp are kept for the next stage of things.

After toying with the idea of splitting a signal for a "bass" channel alongside the guitar, I think it goes against the idea of simplicity first, so this will be looked at again when retracking. I'll do up some signal chain notes when it gets there. For now, there's the "home board".